Showing posts with label exhaust. Show all posts

Wednesday, March 19, 2008

Potential Catalyst Source

I've been keeping an eye open to see if I can find a catalyst that I can use in my cat-less front section. At the moment, I need to replace the entire front section with one fitted with cats when driving on the road (ahem), which involves disconnecting and re-connecting the Exhaust Gas Temperature and lambda sensors.

This is obviously a bit of a hassle, so I've been wanting to find a suitable catalyst that I can install into my de-cat section, so I only have to install or remove the cat and not the entire front section. Well, looks like I might have found something...


It's made in the UK by EEC and the price doesn't seem too bad. I just need to get under my car and measure up my exhaust and beneath the car to get a feel for if it will fit. Looks promising though.

Sunday, October 07, 2007

Missing exhaust bracket fitted

New mounting bracket for Maserati Ghibli's replacement mid section exhaust

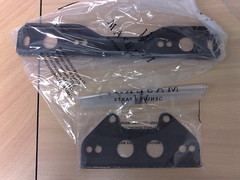
Last week the replacement bracket to fix the new exhaust to the gearbox arrived. I ordered the part from David Askew and as you can see it's brand new from the factory, still in the original packaging.

I got the part fitted yesterday. As you'd expect, it didn't line up perfectly with the attachment points on the exhaust, but it's good enough!

New gearbox fixing bracket installed for replacement exhaust

I had to order two parts, both of which are different to the original ones from the MY92 variant of the Ghibli. The triangular part that attaches to the gearbox is not offset like the old one was and the long part is about 3-4 cm longer than the original part.

So, that's the fitting of the new exhaust finished. After driving around with it for a bit now, it's not massively louder than the original system, but there's certainly a sweet spot... around 3000 rpm it sounds like a proper Italian engine!

Saturday, September 22, 2007

Replacement front section exhaust

Ok, I'm finally writing up the fitting of the replacement front section exhaust.

To recap, I originally ordered a replacement from Larini, but unfortunately it didn't fit so I sent it back and Larini gave me a full refund... so hats off to them for customer service.

Instead, I ordered the Maserati OEM de-cat front section, made by the factory for cars sold to Saudi Arabia. I'd heard on the Maserati Bi-turbo forum (thoroughly recommended by the way... it's a very active forum) that this OEM part is made from stainless steel, although not particularly well finished. However, it's considerably cheaper than the 3rd party replacements available on the market, so I figured what the hell and ordered one.


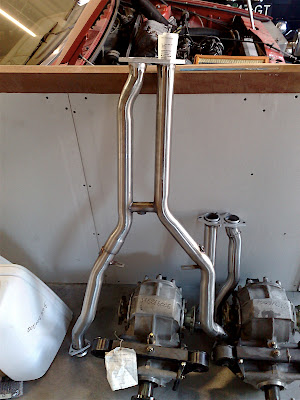
As you can see, the design of the OEM replacement is very simple and what I'd expect for a straight through design... just straight piping in place of the cats. Not only is this cheaper to manufacture, but it also helps minimise exhaust back pressure, since every bend results in a pressure drop. Also, the OEM replacement is made from a larger diameter tubing... it appears to be 50 mm in diameter versus about 40 mm for the original tubing and the rear section that I have fitted. Again, this is good for minimising back pressure.

Finishing of the OEM replacement indeed isn't great. Where this is particularly noticeable is in the fitting of the small diameter cross flow pipes that joint the left and right side pipes to maintain equal (positive) pressure on both sides.


The picture above shows the inside of the piping and you can see on the left hand pipe there's a considerable sized "burr" sticking out into the inside of the pipe. Essentially, the factory never took the time to clean up after welding in the small pipe. It's not a major thing though.

So, everything was looking OK until the replacement section was positioned against a similar part to that which it was replacing... it was about 7 cm longer! It turns out that when the ABS variant of the Ghibli was introduced in 1994, Maserati decided to lengthen this front section exhaust. This is reflected in the part numbers, where the part numbers for this section subtly change. But the strange thing is, the rear sections didn't seem to change, so I can only assume that the rear section remains the same length for all variants of Ghibli. Therefore, the additional length of the front section must be taken up in the bends of the rear section on the post ABS variant cars.

This explains quite a few things, in particular why the Larini part didn't fit. It now seems obvious that there part had been modelled on a post ABS variant Ghibli and therefore should fit these cars no problem at all.

However, this realisation didn't help me!


Fortunately, Jorrit at Auto Forza who was fitting the exhaust for me discovered that there's a steel workshop not far from his workshop that specialises in forming stainless steel, particularly stainless steel tubing... a lucky break! What they did to shorten the exhaust was to cut it and then enlarge one end of the cut with a mandrel which fits inside the pipe and expands it from the inside. Sufficient length of pipe was expanded such that the other cut end could be inserted inside the expanded end, such that they overlapped by the required shortening length. You can make this out in the picture above.

The nice thing about this technique is that it keeps the inside of the pipe flush and smooth, since the weld of the pipes is made against the outside of internal pipe, which is good for gas flow.

The next problem was that this exhaust replacement was meant for a post ABS variant Ghibli and therefore came equipped with two lambda ports, one on each pipe. However, my car is equipped with a single lambda probe and on the original exhaust this is mounted on the front cross flow pipe in front of the cats, as you can see in the picture below.


I could just have installed the probe on one side with the assumption that both banks run about the the same, but I had another driver, since I'm looking to install a wideband lambda so I therefore want to measure average values from both banks.


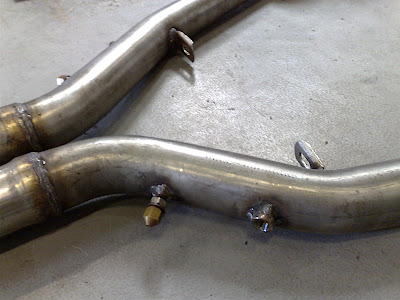
The solution to this was to drill a hole in the cross flow pipe and weld in a nut with the appropriate thread for the new sensor. This turned out to be easier said than done, since we didn't have the right sized nut to had to make one, plus the diameter of the cross flow pipe is quite small, so the face that was being welded onto it had to be profiled.


However, the end result turned out fine. We made sure that there was sufficient space to install the probe (get at it with a spanner). It looks like it sticks up a lot in the picture above, but it fits under the car fine without touching the underside, as you can see in the picture below.


Next, I wanted to install an Exhaust Gas Temperature sensor onto the replacement exhaust. This needs to be placed as close as possible to the outlet of the turbo. Unfortunately, I only have one sensor, but it turns out that installing one on the drivers side pipe would be tricky since there's not much space. So we decided to install it on the passenger side.


As you can see from the picture above, we drilled another hole and welded on a nut with the appropriate thread pretty close to the flange connection that joins the exhaust to the turbo outlet manifold. The picture below shows that the location turned out to be spot on, with sufficient space for the sensor and to run the stiff cable into the cabin.


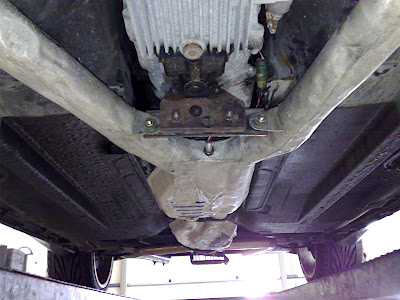
When it came to fitting the replacement section, we realised again that the mounting lugs didn't align with the mounting bracket that is attached to the gearbox housing. The picture below shows the OEM exhaust, but it seems when Maserati changed the design of the front section they also increased the distance between the two pipes around the gearbox. As a result, I've had to order a new mounting bracket to attach the replacement section to the gearbox housing. Fortunately, it's quite cheap!

Once the replacement front section was installed, the rear section needed readjusting to align the outlets in the rear bumper... we ended up having to get the gas out and heat up the rear section to try and get a bit more bend in it (but stainless steel is not as malleable as carbon steel). In the end, a tighter rubber hanger did the trick.

As you can hear on a previous posting, the new front section leads to a much more aggressive rumble from emanating out of the back of the car and slightly louder, although not half as loud as I expected it to be. Performance wise, it's hard to tell if there's any benefit since there's something not right with the engine set up at present... but I'm working on that. Once that's sorted, I may be able to better gauge the value of the replacement.

The new fixing bracket should arrive within the next, along with some wheel spacers that I ordered. I return to Jorrit to get these fitted and while I'm there I'm planning on doing a couple more tests... a cylinder leak test and a change of spark plugs and if we get time I'd like to test the mechanical timing.

Thursday, September 06, 2007

New exhaust fitted

Well, I got the new mid section fitted on Tuesday. I'll write a longer post over the weekend, but in the meantime, here's a short "before and after" video.

Sunday, August 26, 2007

Alternative exhaust sourced

Well, following the disappointing news from Larini (they're currently developing some products for the Maserati 4200 so don't have time or see the value in refining the Ghibli cat replacement products) I've ended up ordering an OEM Maserati exhaust.


Maserati made a de-cat version of the front exhaust exclusively for cars being shipped for the Saudi market and there's still some units remaining in stock at the factory. Seems there's not a high demand for these parts, since the price is very reasonable... I'm saving almost 50% over the Larini system. It won't look as nice as the Larini system, but it's still made of stainless steel and since it sits beneath the car you don't see it anyway. So hopefully it will arrive while I'm away on a business trip and be ready for me to have installed when I return in a week or so.

I've also had a quote for the wheel spacers from a German supplier. However, I've changed my mind on the front spacers, where I'm only going to install 3 mm spacers, since the wheels are already pretty flush with the arches. But at the rear, I'm going to install 10 mm spacers since there's plenty of spacer there. It should help the grip at the rear a little too.

Tuesday, August 21, 2007

Exhaust problems

Well, as you're aware I ordered a replacement cat section for my Ghibli from Larini, which arrived a couple of weeks ago. Unfortunately, it didn't fit, so Larini paid for the system to be returned to them, I thought for modification.

However, they now want to refund my money and pull their range of cat replacement systems for the Ghibli since they can't gaurantee that they can offer a direct replacement system. It seems that there's large tolerances in the Maserati design and so the chances of the replacement system fitting without needing significant modification is too low.

Therefore, I need to source an alternative supplier. This is a real shame since I'd prefer to have had a complete exhaust system from a single source, but seems that the only way of getting the replacement cat section from Larini to fit would be to take the car to their workshop.

I should stress that the Larini rear section system does fit however, since the design of this section enables sufficient flexibility to line it up properly beneath the car.

So I'm now waiting for a response from Tubi Style's European distributor Italparts to see if they can provide me with a system, as listed on Enrico's pages. The part number for the cat section is 03029311030. I sent them an email yesterday and gave them a call this morning and they should be getting back to me this afternoon. Fingers crossed!

Thursday, August 16, 2007

Home at last


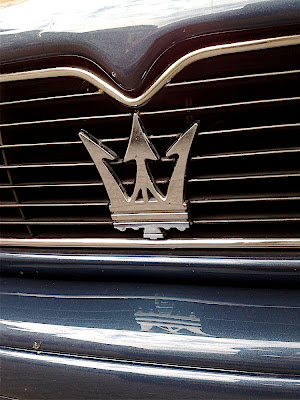
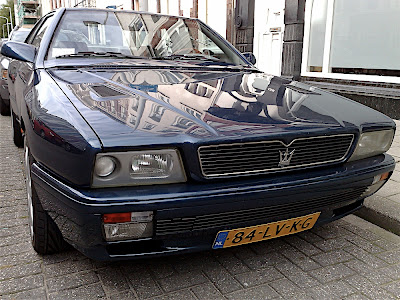
I finally got my Ghibli back this weekend after what seems an eternity. The last couple of weeks have certainly been eventful! As you can see from the picture above, I no longer have a large crack in the center of the front bumper, so now there's nothing to distract the eye from the fabulous shiny trident!


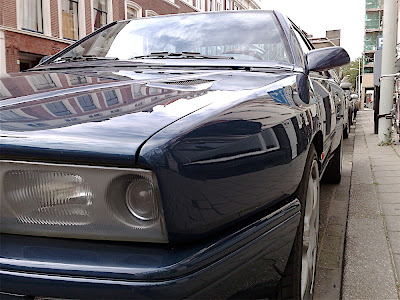
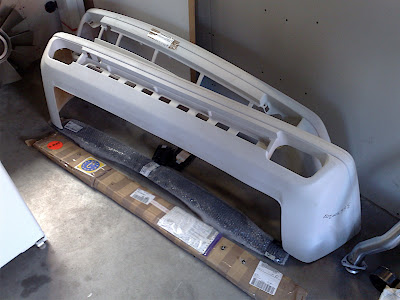
The replacement bumpers are of the new variety, made from a flexible plastic material versus the stiff fibre glass used for the old bumper that proved itself to be pretty brittle. As you can see in the picture above, the new bumpers are without the black rubber insert for protecting against scratches from minor nudges, but instead the new ones are a single tone. I think the new ones look nicer for it.


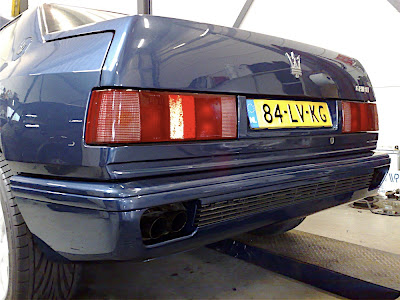
I also had the rear bumper replaced as the corners on the old ones had cracked as well as starting to flake a little around the exhaust outlets.

The new exhausts, given that they're much more flexible, require a steel plate to be installed across the width of the car onto which to bolt to provide some rigidity to the bumper. The factory was out of stock for the rear bar, with the part on back order and not available until September some time. I therefore purchased the part from David Askew instead, since he had it in stock. Despite being brand new and still in the original packaging, the part still required bending into shape before fitting. Maserati obviously did not have a tight tolerance on this part!

For the front stiffening bar, the factory did send a part, which was labelled as being for the front of a Ghibli. However, when Jorrit came to fit it, it turned out to have been mislabelled at the factory; it was in fact the rear bar from a Quatroporte. Although the factory said they had the proper part in stock and would send it immediately, after a couple of days it turned out that the part was also on back order at the factory and would not be available until September. I therefore ended up driving to visit David Askew, since I was over in the UK this weekend anyway visiting my parents. He had a used part in decent shape, which although required a bit of bending into shape, looked like new after Jorrit gave it a spray of paint.


The paint shop also removed the dent from the left front wing. They even touched up the paint, which is more than I asked for, but I'm not complaining since they did a good job! I'm sure I'll pay for it though.

Unfortunately, I'm still waiting to get the new front section exhaust to get fitted; the replacement needs a bit of refinement, but should be sorted soon.

It's great to have the car back since I've really missed driving it. I did have a bit of a scare today though... I was watching the voltmeter and noticed it slowly dropping from 12 volts, down to 11 volts and slowly less less. I was sure the alternator had packed in, so hurriedly drove back home before the car shut down. When I got back I got the multi-meter out and measured the voltage across the battery... 12.7 volts. Then with the engine running... 14.3 volts. Seems that the volt meter circuit has some problems... the voltmeter has been playing up for a while, intermittently on and off, but I've not seen it misreading before. Something new to look into!

Wednesday, July 18, 2007

Latest parts have arrived...

I dropped my car off this afternoon with Jorrit at Auto Forza for him to work on the list of jobs I listed a couple of posts ago. Hopefully it will be ready before the end of next week so that I can drive down to France in it with my wife for our holiday!

The new front section Larini de-cat sports exhaust was unpacked and waiting at Jorrit's workshop. As you can see below, it's seems overly complicated for a de-cat exhaust, with all the original bends in of the Maserati OEM exhaust and even the flange connection between where the two cats are located on the original exhaust. No wonder it wasn't cheap!


So both Jorrit and I are wondering why they've not just made a single, straight pipe section? I suspect it has something to do with them making it as a modular part, that can be used to build up any of the exhaust options... either sports cat, de-cat muffled or straight through pipes like I have. If they're really advanced, it might be to make the sections equal length or maybe to minimise resonance in the exhaust? I'll have to ask them...

Also arrived are my replacement bumpers. These are the new style ones fitted to the ABS Ghibli and later models, essentially made from a much more malleable material that is less prone to cracking as suffered by the bumpers currently fitted on my car.


Since they're much less stiff than my current bumpers, they require a steel plate to be installed behind them to keep them in shape and offer some resistance to impact. As you can see, they need spraying, which should get finished tomorrow.

There's always something interesting going on at Jorrit's when I visit... I arrived to find him playing with a Quatroporte V8 Evoluzione engine that he'd dismantled, which he seemed to take pleasure talking me though and explaining what he was doing with it... which of course I found extremely interesting!

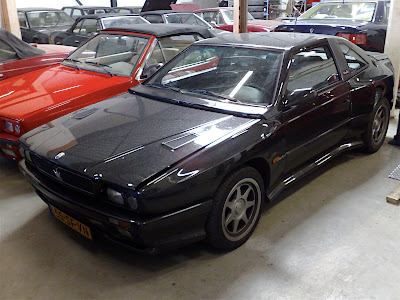
I couldn't help but notice the black Shamal that he had in there too... I recognised it instantly as belonging to Mark... there's not many Shamal's around after all, so it was a fair bet. It was great having a look around the engine bay... there's so many parts common to my Ghibli. Jorrit treated me my starting up the engine so that I could listen to the warbling V8... hope you don't mind Mark... but it sounds great with a pretty smooth idle compared to my Ghibli.


Anyway, can't wait to pick up the car and try out the new exhaust... I really hope it will be ready next week!

Tuesday, July 03, 2007

Garage appointment booked

Not much to report other than the new exhaust should be delivered by the end of this week (Larini seems to be a bit stretched at the moment, since they told me two to three weeks delivery but are taking more like four to five).

All the parts for changing out the bumpers have arrived at the garage except for some of the the adapter fittings (since the new bumpers are designed to fit on an ABS Ghibli, which has a slightly different fitting to the non-ABS cars), but hopefully these will arrive before the end of the week. I also noticed that the rubber elbow pipe leading to my driver's side intercooler was looking a bit cracked and have therefore ordered a new one... which is still yet to arrive, but Jorrit has a decent second hand one in his store which he'll fit if the new part hasn't arrived in time.

Here's a summary of the work that's hopefully getting done:

  1. Replace bumpers front and back (including re-spray).
  2. Roll out dent on front left wing.
  3. Roll out dent in floor in driver’s side foot well.
  4. Change out cracked rubber elbow into left intercooler.
  5. Fasten boost solenoid valve (the original screw has fallen out).
  6. Fabricate and fit new fixing brackets for air boxes.
  7. Get the car APK tested (road worthiness test).
  8. Fit new exhaust.
  9. Fit wide-band lambda probe (including resistor) and wire in data-logger to ECU wiring harness (just the power and lambda probe for now). I need the pin diagram for non-ABS Ghibli (think it's the same as for a 224?). Once I have the pin diagram then I can wire in the other signals. Install the exhaust gas temperature probe on the exhaust and run the cables into the cockpit along with the lambda probe cables. I think there’s a spare port on the exhaust, otherwise will have to drill a hole and weld one on? It’s a 1/8” NPT fitting.
  10. The voltmeter still stops working so will see if it can be fixed? Maybe a faulty earth connection?
  11. Check engine timing; the car is loosing power above 4000 rpm, which may be an indication of problems with the distributor or valve timing. I’m convinced the car is loosing 10-20% power above 4000 rpm and since the fuelling looks fine from the last dyno (although the wideband lambda will be able to confirm this) the likely culprit is either air flow/temperature (changing the exhaust will help determine this) or timing (I’ve no reason to suspect that the ECU timing is incorrect since it’s not been re-programmed since the car was running well and producing 330 hp). So I think it’s a mechanical problem (unless one of the sensors to the ECU is malfunctioning, but if I get the data logger setup then I should be able to check this).
  12. Determine amount of offset required to prevent front wheels from fouling suspension bars on full steering lock; I’ll have some wheel spacers made front and back (additional 10 mm would probably solve the problem?) once I know the required offset.
  13. Fit new pin in passenger’s side door hinge. The old one has fallen out and now the door makes a loud cracking noise when opened due to the spring force in the hinge.
  14. Check the clutch… the position that the clutch is engaging feels a bit high on the clutch pedal travel (i.e. the clutch pedal is almost fully out before the clutch feels to fully engage). This may be caused by the steep ramp I have to drive up in order to get the park out of the garage where I have the car parked?

If all this is sorted then the car should be running great, plus I can start getting some engine data to play with and use to focus my future upgrading efforts. Plus, once I install the accelerometers then I can get some road dyno results instead of having to go to the dyno all the time.